
 By sl lives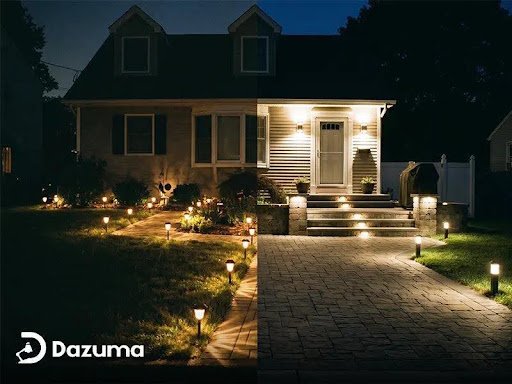
Solar lights look wonderfully simple: place them outside, let the sun charge them, and enjoy the garden after dark. In practice, their performance depends on more than the fixture’s appearance. Trees cast moving shadows, walls block afternoon sun, seasons change, and some locations need more light than others. A thoughtful plan can make a noticeable difference.
The key is to treat the solar panel as seriously as the lamp. Every fixture needs enough daylight to recharge its battery, but it also needs to put light in a useful location. When those two requirements conflict, adjusting the position, choosing a different fixture type, or using a design with a separate panel can help.
Map Sunlight Before Choosing Locations
Walk through the yard in the morning, around midday, and again later in the afternoon. Note which areas receive direct sun and which remain under roof overhangs, tree canopies, fences, or neighboring buildings. A place that looks sunny at noon may be shaded for most of the charging day.
Before installing Solar Outdoor Lighting, identify the brightest practical positions for panels. Path edges, open planting beds, fence posts, and freestanding structures may receive better exposure than the exact spot you first imagined. If a light has an adjustable panel, aim it according to the product instructions and local sun path.
Match the Fixture to the Job
Not every part of the garden needs the same amount or direction of light. Low path lights can help define a walkway, while deck or step lights reveal changes in level. Wall lights may support an entrance, and portable lanterns add atmosphere around seating. Decorative lights can be softer because they are not responsible for safe movement.
Begin with essential locations rather than filling every dark area. Prioritize steps, gates, turns, and the route between the house and frequently used outdoor spaces. Once those needs are covered, add accent lighting to selected plants or architectural features. This staged approach reduces clutter and makes it easier to judge whether each fixture contributes something useful.
Use Solar Spotlights With a Clear Purpose
Solar Spotlights are designed to direct a stronger, narrower beam toward a particular subject. They can highlight a tree trunk, textured wall, sculpture, sign, or planting group. Without a clear target, however, a bright beam may create glare or make the rest of the yard look darker by comparison.
Test the angle at night before fixing the spotlight permanently. Lighting from below emphasizes height, side lighting brings out texture, and backlighting can create a silhouette. Keep the beam away from windows, seating positions, and neighboring properties. Small changes in tilt often improve the result more than increasing brightness.
Separate the Panel From the Light When Necessary
An integrated solar fixture is convenient when the ideal lighting location also receives strong sun. Problems arise beneath dense foliage, inside a covered patio, or beside a north-facing wall. In these situations, a fixture with a remotely mounted panel may allow the lamp to remain in shade while the panel sits in a brighter nearby position.
Expect Performance to Change With the Seasons
Solar lighting may operate differently in winter than in summer. Shorter days provide less charging time, low sun angles change shadows, and cold or cloudy periods can reduce nighttime duration. A fixture that performs well through a long summer evening may produce a shorter or softer output during less favorable conditions.
Plan around that variation instead of expecting identical performance every night. Reserve the best-charging locations for lights that support steps and walking routes. Decorative accents can tolerate more variation. If dependable illumination is essential for security or a hazardous area, consider whether a hardwired system should provide the primary light and solar fixtures should serve as supplements.

Control Glare and Avoid Overlighting
More fixtures do not automatically create a better garden. Bright lights placed close together can flatten the landscape and make the outdoor space feel commercial. Use lower-level light for navigation and reserve stronger beams for a small number of focal points. Darker areas between them create depth and allow the eye to rest.
Keep Panels and Lenses Clean
Dust, pollen, leaves, bird droppings, and snow can reduce the light reaching a solar panel. Wipe panels gently as recommended by the manufacturer and clear vegetation before it grows over them. Clean lamp lenses as well, since dirt can weaken or distort the beam even when the battery is fully charged.
Review the system every few months. Re-aim spotlights as plants grow, straighten fixtures shifted by weather, and check for corrosion or loose mounts. If performance drops, first look for new shade or a dirty panel before assuming the fixture has failed. Rechargeable batteries may eventually need service or replacement when the design allows it.
Build a Flexible Solar Lighting Plan
A successful layout begins with sunlight, not darkness. Identify reliable charging areas, match each fixture to a specific task, and test the nighttime effect before expanding the system. By combining gentle general lighting with a few focused accents, solar fixtures can make a garden easier to use and more enjoyable without unnecessary wiring or excessive brightness.