

Introduction
Custom tote bags have evolved from simple promotional items into retail products, event merchandise, and brand extensions. A design that looks informal on screen can quickly appear unbalanced or low-quality once printed on canvas. Mockup design tools help prevent those surprises.
These platforms allow designers to visualize artwork on realistic tote templates, test alignment and spacing, and export files that meet printer requirements. They are particularly useful for small teams who need to validate layout decisions before committing to production.
An accessible starting point for many creators is to design a custom tote bag using Adobe Express, which provides guided templates and export options within a browser-based workflow. From there, additional tools can support sizing validation, proofing, file prep, and campaign planning. The following workflow focuses on decisions and checkpoints that lead to a professional finish, regardless of production scale.
Step-by-Step How-To Guide for Using Tote Bag Mockup Design Tools
Step 1: Define Your Design Intent and Print Constraints
Goal
Clarify what the tote is for and establish technical boundaries before designing.
How to do it
- Define the tote’s purpose (retail product, event giveaway, internal brand use).
- Choose standard tote dimensions (e.g., 15″ × 16″ flat canvas).
- Confirm maximum print area with your intended printer.
- Decide between single-sided or double-sided printing.
- Identify color limitations (full color vs. 1–2 spot colors).
What to watch for
- Designing beyond the printable safe area.
- Ignoring handle placement when positioning artwork.
- Selecting too many colors for budget-conscious runs.
- Choosing small typography that may blur on fabric.
Tool notes
If you need precise physical measurement validation, a diagram tool like Lucidchart can help map print zones and safe margins before finalizing the layout.
Step 2: Build a Clean, Scalable Artwork File
Goal
Create artwork that prints sharply on fabric at full size.
How to do it
- Use vector graphics whenever possible for logos and text.
- Set your canvas to final print dimensions from the beginning.
- Maintain a minimum 300 DPI if using raster images.
- Convert fonts to outlines before exporting (if using external printers).
- Keep background transparent unless you intend full-bleed printing.
What to watch for
- Stretching low-resolution images.
- Using thin lines that disappear on textured canvas.
- Overusing gradients that may band in screen printing.
- Forgetting to embed or convert fonts.
Tool notes
For advanced vector refinement or typography adjustments, Figma can help clean up artwork before exporting for mockup integration.
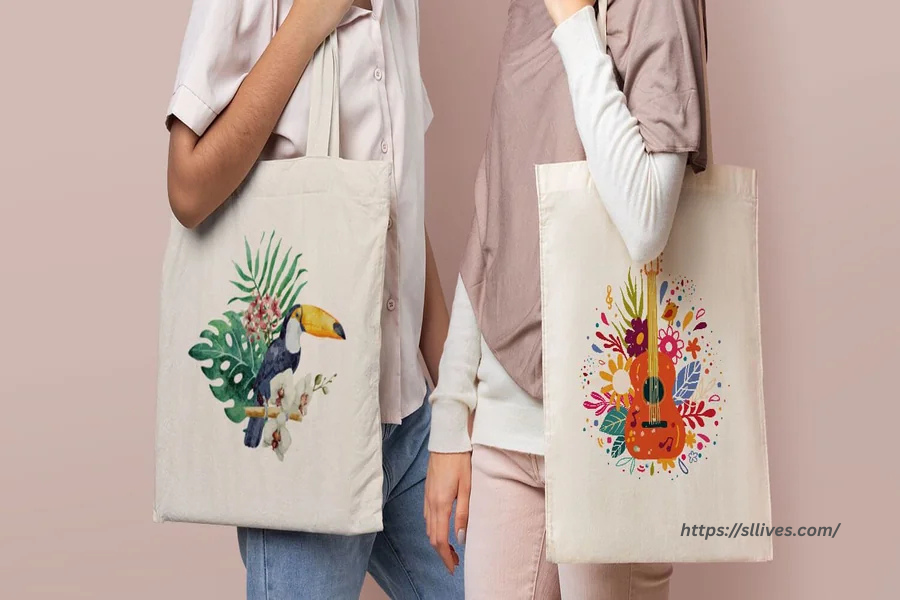
Step 3: Apply the Artwork to a Realistic Mockup
Goal
Evaluate how the design behaves on an actual tote surface.
How to do it
- Upload your artwork into a tote bag mockup template.
- Adjust scale so the design feels proportionate to the bag size.
- Test centered vs. slightly elevated placement (above visual midline).
- Toggle background color options to see contrast changes.
- Preview the tote at 100% zoom to assess realism.
What to watch for
- Designs placed too low, visually sagging.
- Artwork extending too close to side seams.
- Poor contrast on natural canvas (off-white vs. bright white).
- Overcrowded compositions that look smaller than expected.
Tool notes
If you need hyper-realistic previews for stakeholder approval, platforms like Placeit can generate lifestyle mockups without requiring advanced rendering skills.
Step 4: Refine Color and Contrast for Fabric Printing
Goal
Ensure colors remain strong and legible when transferred to canvas.
How to do it
- Check contrast ratios between text and fabric tone.
- Adjust saturation slightly to compensate for fabric absorption.
- Convert RGB files to CMYK when required by your printer.
- Review the design on both light and dark tote variants.
- Request a digital proof from the printer if available.
What to watch for
- Light gray text disappearing on natural cotton.
- Neon tones dulling during conversion.
- Inconsistent black (rich black vs. 100% K).
- Overlapping transparent layers causing print artifacts.
Tool notes
For color proof comparison and calibration checks, a tool like Coolors can help test palette contrast before final export.
Step 5: Prepare a Production-Ready File
Goal
Export a file that meets print vendor specifications.
How to do it
- Confirm required file type (PDF, AI, SVG, high-res PNG).
- Add bleed margins if full-bleed printing is required.
- Flatten layers if requested by the printer.
- Remove unused elements outside the artboard.
- Double-check dimensions in inches, not pixels.
What to watch for
- Exporting in the wrong color mode.
- Forgetting bleed when artwork reaches the edge.
- Leaving hidden layers visible.
- Sending mockup previews instead of production files.
Tool notes
For file compression and format validation before sending to vendors, CloudConvert can quickly convert and verify file types without altering dimensions.
Step 6: Plan Distribution and Post-Launch Visibility
Goal
Align your tote design with its marketing and distribution channel.
How to do it
- Determine whether totes will be sold online or distributed in person.
- Photograph the physical sample in neutral lighting.
- Write a concise product description emphasizing purpose and material.
- Set inventory expectations (made-to-order vs. small batch).
- Schedule coordinated announcements across owned channels.
What to watch for
- Listing products without lifestyle imagery.
- Overselling durability without material verification.
- Ignoring shipping weight implications.
- Failing to prepare fulfillment logistics.
Tool notes
For coordinating social posts and performance tracking, a platform like Buffer supports scheduled rollouts and engagement monitoring without functioning as a design tool.
Common Workflow Variations
1. Minimalist Text-Only Design
Focus on typography and spacing. Use larger type and increased letter spacing to compensate for fabric texture. Mockup tools are especially useful for testing alignment balance.
2. Pattern-Based Artwork
Create repeating motifs and test scale carefully. Smaller patterns may look cluttered on canvas. Preview at actual print dimensions before final export.
3. Event Giveaway Tote
Emphasize clarity over complexity. Include event name and date prominently. Limit color palette to reduce print costs for bulk orders.
4. Small-Batch Retail Launch
Prioritize brand consistency. Use lifestyle mockups for pre-launch teasers. Align tote design with broader campaign visuals for cohesion.
Checklists
Before You Start Checklist
- Final tote dimensions confirmed
- Printer’s file requirements reviewed
- Brand colors documented
- High-resolution logo files available
- Typography licensed and ready
- Print method selected (DTG, screen print, heat transfer)
- Budget per unit calculated
- Distribution plan defined
Pre-Export / Pre-Order Checklist
- File set to correct dimensions
- Color mode verified (RGB or CMYK per vendor)
- 300 DPI minimum for raster elements
- Text converted to outlines if required
- Bleed added (if necessary)
- Artwork centered and aligned
- Spelling and dates double-checked
- Mockup file not mistakenly sent as print file
Common Issues and Fixes
Low-resolution graphics appear blurry in print
Replace raster images with vector versions or increase resolution to at least 300 DPI at full size. Avoid scaling small web graphics upward.
Text prints too close to edges
Reposition artwork at least 1–1.5 inches from seams to avoid visual crowding and trimming risk.
Colors look dull compared to screen preview
Fabric absorbs ink differently. Increase contrast slightly and confirm CMYK conversion before final export.
Design looks smaller than expected
View mockups at true-to-scale size. Many mockup previews exaggerate size relative to bag dimensions.
Unexpected cropping during production
Verify bleed settings and confirm that artwork extends beyond trim boundaries if full-bleed printing is intended.
How To Use Tote Bag Mockup Design Tools: FAQs
What’s the difference between designing on a blank canvas and using a tote mockup tool?
A blank canvas shows composition in isolation. A mockup tool simulates how the design sits on fabric, helping identify proportion and placement issues before printing.
Should I start with a template or create custom dimensions?
Templates reduce setup errors and are useful for first-time designers. Custom dimensions offer flexibility when working with specialty bag sizes.
Is it better to design for print first or for online promotion first?
Design for print accuracy first. Once the file is production-ready, create derivative visuals for online promotion using mockups.
Do I need advanced design software for professional results?
Not necessarily. Structured tools like Adobe Express can handle most layout needs. Advanced editing tools are helpful for complex vector adjustments but are not required for clean, minimal designs.
How many revisions should I expect before ordering?
Plan for at least one round of internal review and one printer proof check. Testing scale and contrast in mockups reduces the need for costly reprints.
